Class A Pre-Trip Inspection Study App
The CDL Pre-Trip Inspection can be the most daunting portion of the driving test. But, it's easy if you study.
Use this FREE study guide to prepare for your CDL Skills test.
Would you like a video version of the Pre-Trip Inspection? Scroll to the bottom of this page for a free video.
Courtesy of CDL College.
Tips
Metal Parts: cannot be broken or cracked and must
be securely mounted.
Rubber Parts: no abrasions, bulges, or cuts.
Parts that hold a Fluid or Air: cannot be leaking.
Example: the engine air compressor (a metal part) is securely mounted, not cracked,
gear-driven, and has no audible leaks.
• The Pre-Trip Inspection is a verbal test.
• Say at least 2 things about every item you inspect.
• Point to, or touch, every item that you inspect.
• Mention all damaged items to the tester.
01: Engine Compartment + 1 Axle
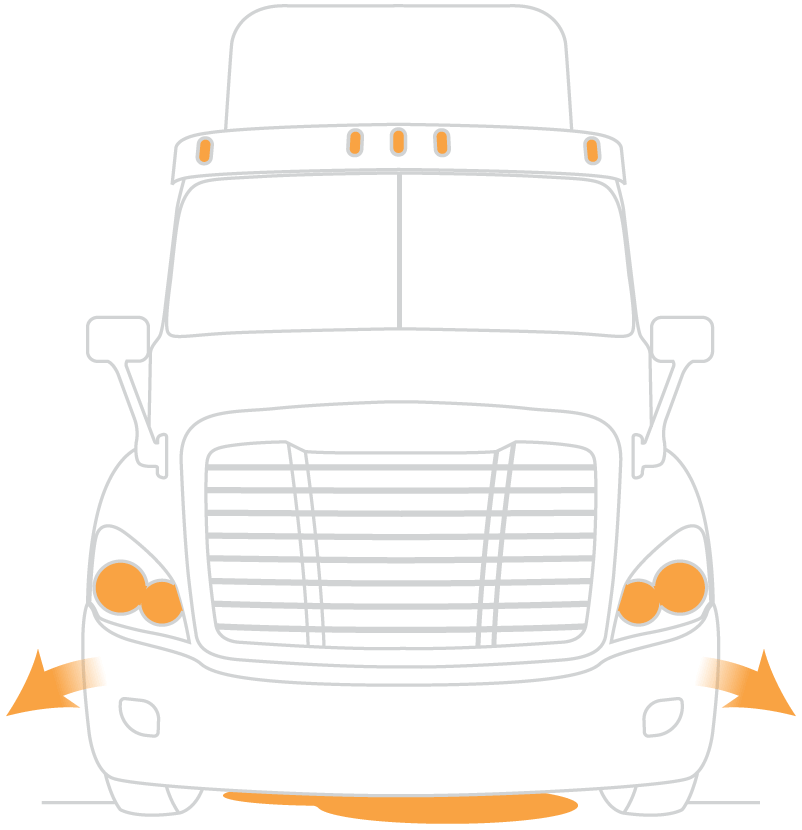
Stand in front of the truck.
(3 L’s) Lights, Leans, Leaks
Verify that the LIGHTS on the front of the truck are the proper color, securely mounted, not cracked or broken, and clean.
Next, make sure the truck isn’t LEANing to one side, which could indicate a suspension problem or low tire pressure.
Ensure there are no LEAKS underneath the engine compartment.
Check the front of truck for damage. When you find damage on the vehicle, tell the tester that you’ll note it on your Vehicle Inspection Report.
3 Components
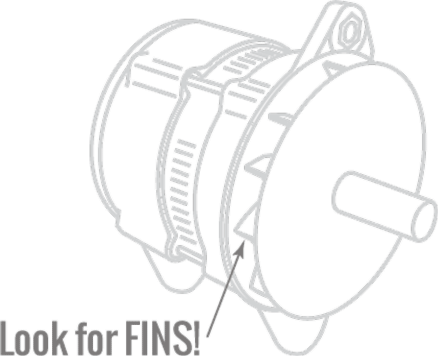
Alternator: securely mounted, not cracked; wires are properly fastened and not frayed. Belt or gear driven: If belt-driven, belt has no more than 1/2" to 3/4" of play, and no cuts or splits.
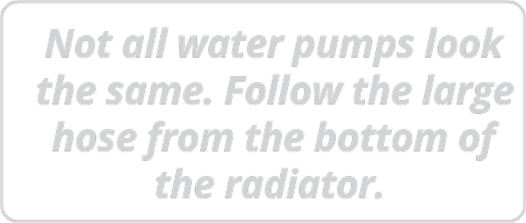
Water Pump: (see box on right) properly mounted and not broken; no visible leaks; belt or gear driven: belt has no more than 1/2" to 3/4" inch of play and no splits or cuts.
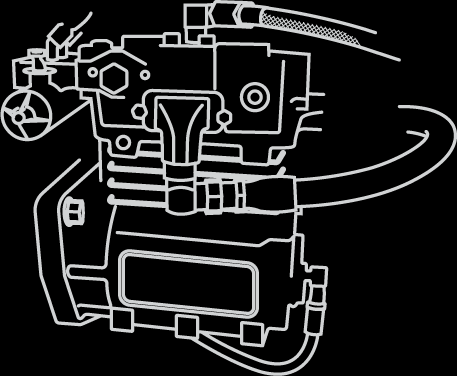
Air Compressor: securely mounted to engine, not broken or cracked; no audible leaks; belt or gear driven: belt has no more than 1/2" to 3/4" inch of play and no splits or cuts.
3 Fluids
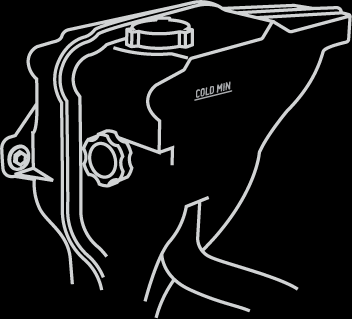
Coolant: verify proper level through sight glass or dipstick; reservoir is properly mounted not cracked; check the hoses for splits or cuts and ensure they are securely mounted at both ends.
Oil: indicate where the dipstick is located and that the oil is at the proper level.

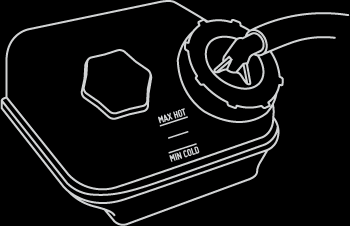
Power Steering: verify proper level through sight glass or dipstick; reservoir is securely mounted and not cracked; check the hoses for splits or cuts and ensure they are securely mounted at both ends.
Belts and Hoses
After properly inspecting the power steering hose and the coolant hose, tell the tester that you would inspect all remaining hoses the same
way.
After properly inspecting the alternator belt, tell the tester that you
will inspect all remaining belts the same way.
Axle
Steering
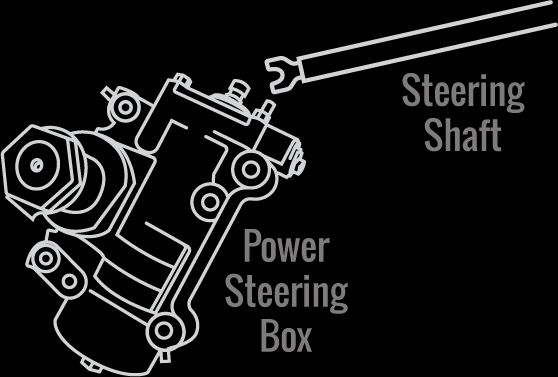
Steering Shaft: not bent or broken and securely mounted; no excessive
play.
Steering Gear Box: properly mounted to frame and not cracked or broken; no
visible leaks; HOSE has no visible leaks and is properly mounted at both ends.
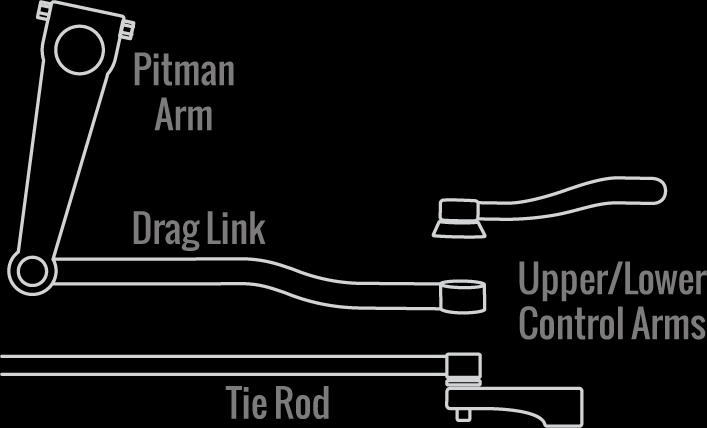
Pitman Arm: not cracked and securely mounted, all hardware is present.
Castle nuts and cotter pins are present and tight.
Drag Link: not broken and properly mounted at both ends. Rubber bushings:
not split or cut and properly greased.
Upper/Lower Control Arms and Tie Rod: not broken and securely mounted, all
hardware present.
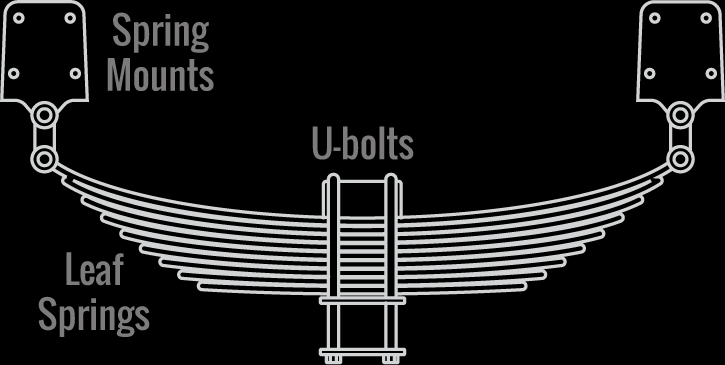
Spring Mounts: spring mounts and hardware are not cracked or broken and
properly mounted to frame.
Leaf Springs: not cracked or broken, not shifted or scissored; properly
mounted to spring hangers.
U-bolts: not cracked or broken and securely mounted.
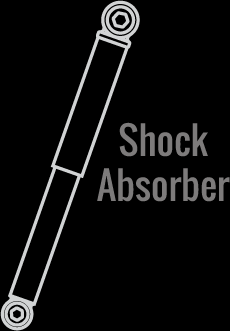
Shock Absorber: not bent or broken and mounted securely; no visible leaks; rubber bushings have no dry-rot.
Brakes
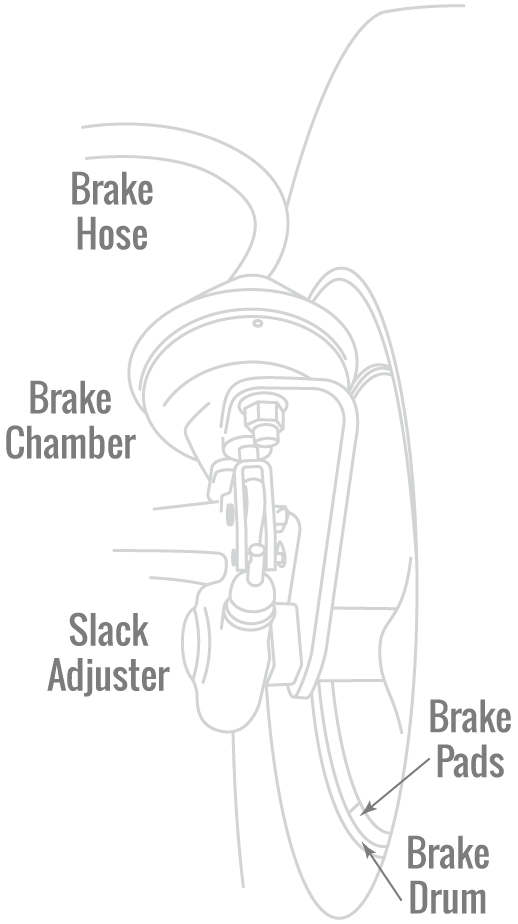
Brake Hose: hose to brake chamber not split or cut, no audible leaks,
and securely mounted at both ends.
Brake Chamber: not cracked or broken and securely mounted; no audible
leaks.
Slack Adjuster: no missing hardware and properly mounted; push rod has no
more than 1" of play and is at a 90° angle to brake chamber.
Brake Drum: securely mounted and not broken, no bluing from excessive
heat.
Brake Pads: securely mounted and not broken; minimum brake pad thickness
is 1/4".
Wheel/Tire
Wheel inside: not broken and securely mounted; no welding repairs.
Tire: sidewalls have no cuts or bulges; steer tire tread depth is 4/32"
min.; tread is evenly worn; check inflation w/ air gauge (do not kick tires); no re-treads on steers.
Wheel outside: securely mounted and not cracked, no illegal welds.
Valve Stem: properly secured and not broken; no audible leaks, has a metal
cap.
Lug Nuts: not cracked or broken; all lug nuts are present and tight.
Hub Seal: not cracked, broken, or loose; no visible leaks.
End this portion of the inspection at the Hub Seal.

02: Side and Back of Truck + 1 Axle
Side and Back of Truck
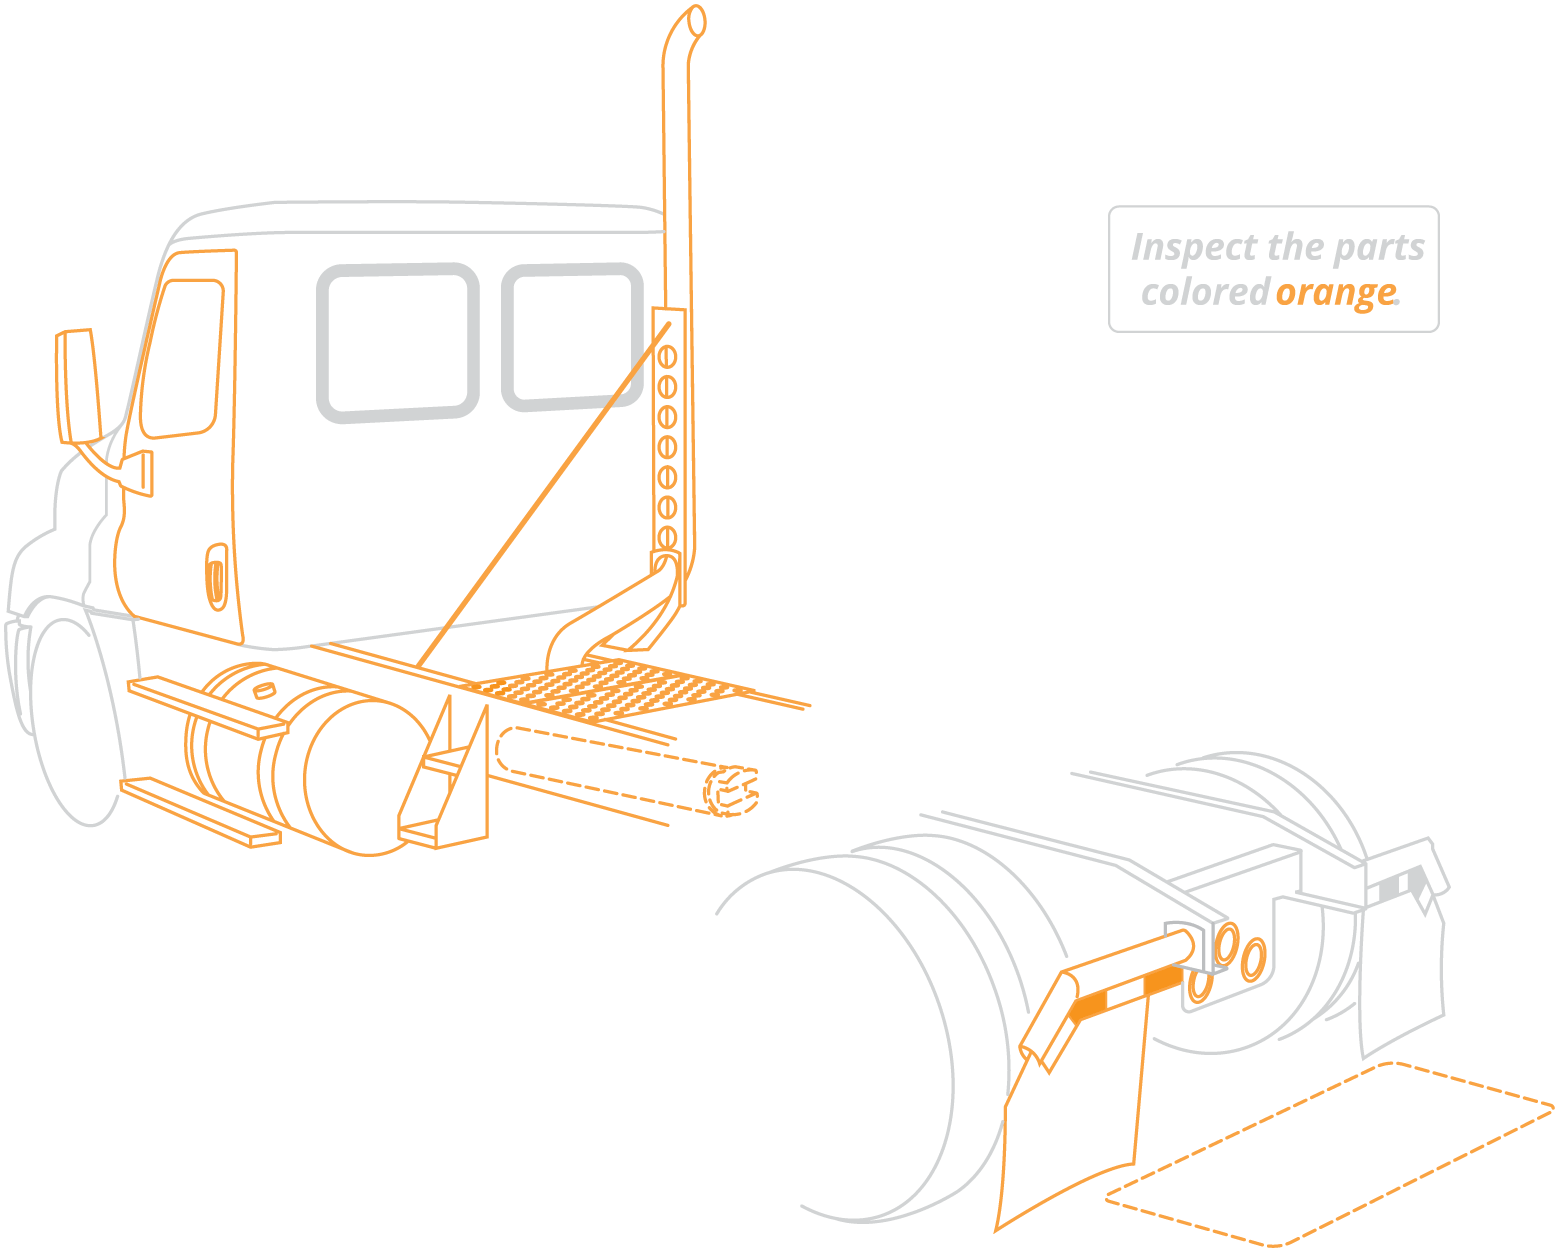
Mirror bracket: properly attached to truck and not broken, all hardware
in place.
Door: securely mounted and opens and closes; hinges not broken and securely
mounted; rubber seal not split or cut and is properly mounted.
Steps: hold my weight, not loose, no debris.
Fuel tank: not leaking and no loose hardware; cap is tight, seal intact and
chain present.
Exhaust: not loose, all hardware present, no evidence of leaks (exterior
soot).
Cat Walk and Steps: properly mounted and not excessively dirty.
Frame: not twisted or broken and no illegal welds.
Drive Shaft: not cracked or broken, U-joints not broken and have no foreign
objects.
Rear truck lights: proper color, all lights are present, not cracked or
dirty, no moisture inside the lens.
Mud Flap: bracket is securely mounted and not cracked, all hardware in
place; mud flap not split or cut. DOT tape is securely mounted, not dirty, covers 100% of rear.
Space: enough space between rear of truck and landing gear for turns.
Note: axle suspension components can be different from truck to truck. You should determine which
suspension components are present and inspect those components. Axles consist of suspension, brakes, wheels, and tires.
Spring mounts: spring mounts and hardware are not cracked or broken and
properly mounted to frame.
Leaf Springs: not cracked or broken, not shifted or scissored; properly
mounted to spring hangers.
U-bolts: not cracked or broken and securely mounted.
Shock Absorber: not bent or broken and mounted securely; no visible leaks;
rubber bushings have no dry-rot.
Air Bags: not split or cut, no audible leaks; mounts are properly secured
and not cracked.
Brake Hose: hose to brake chamber not split or cut, no audible leaks,
securely mounted at both ends.
Brake Chamber: not cracked or broken and securely mounted; no audible
leaks.
Slack Adjuster: no missing hardware and properly mounted; push rod has no
more than 1" of play and is at a 90° angle to brake chamber.
Brake Drum: securely mounted and not broken, no bluing from excessive
heat.
Brake Pads: securely mounted and not broken; minimum brake pad thickness is
1/4".
Wheel inside: not broken and securely mounted; no welding repairs.
Tires: sidewalls have no cuts or bulges; tread depth on drive tires is
2/32" min.; evenly worn; check inflation w/ air gauge (do not kick tires); can be re-treads; Dual Tires: no foreign
objects between tires, no gap between wheels.
Wheel Outside: not cracked, securely mounted, no welding repairs.
Valve Stem: properly secured and not broken; no audible leaks, has a metal
cap.
Lug Nuts: not cracked or broken; all lug nuts are present and tight.
Hub Seal: not cracked, broken, or loose; no visible leaks.
End this inspection at the Hub Seal.

03: Connections
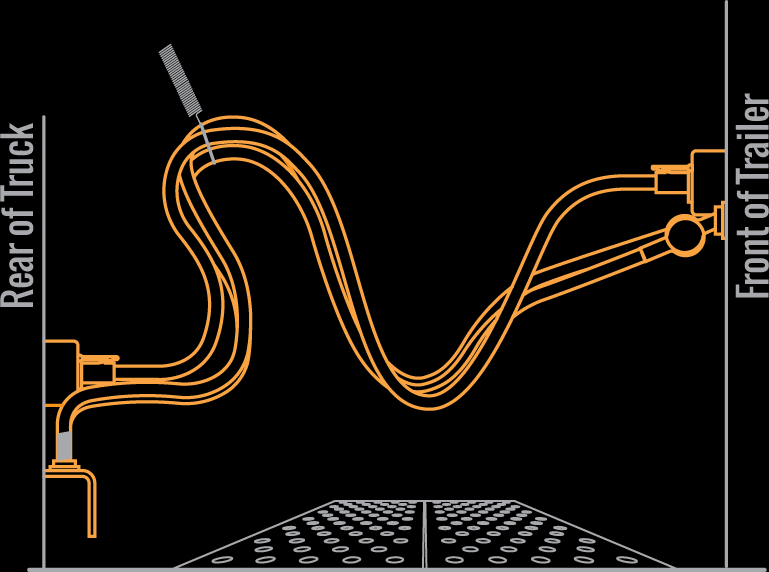
Locate the air lines and the electrical line at the rear of the cab.
Air Lines should be securely mounted at BOTH ends. All hardware is present, nothing broken. Lines have no cuts or splits and no audible leaks. Glad hands are locked in place, not broken, and seals are not split or cut.
Electrical line is securely mounted at BOTH ends. All hardware is present and tight. Lines have no cuts or splits. Safety latches are in place. Lines are not tangled or dragging on catwalk.
Fifth Wheel Assembly: Apron: securely mounted, not cracked or broken. No
gap between apron and skid plate.
Skid Plate: properly greased, securely mounted, not cracked. Pivot pin is
securely mounted, not cracked or broken.
Platform: is securely mounted to frame and not cracked or broken.
Release Handle: securely mounted, not broken and in locked position.
Sliding Fifth Wheel? The actuator is not cracked or broken; air line is
securely mounted, no audible leaks, no cuts or splits).

Kingpin and Locking Jaws: securely mounted and not worn. Locking jaws are secure around kingpin, both are properly greased.

04: Trailer + 1 Axle
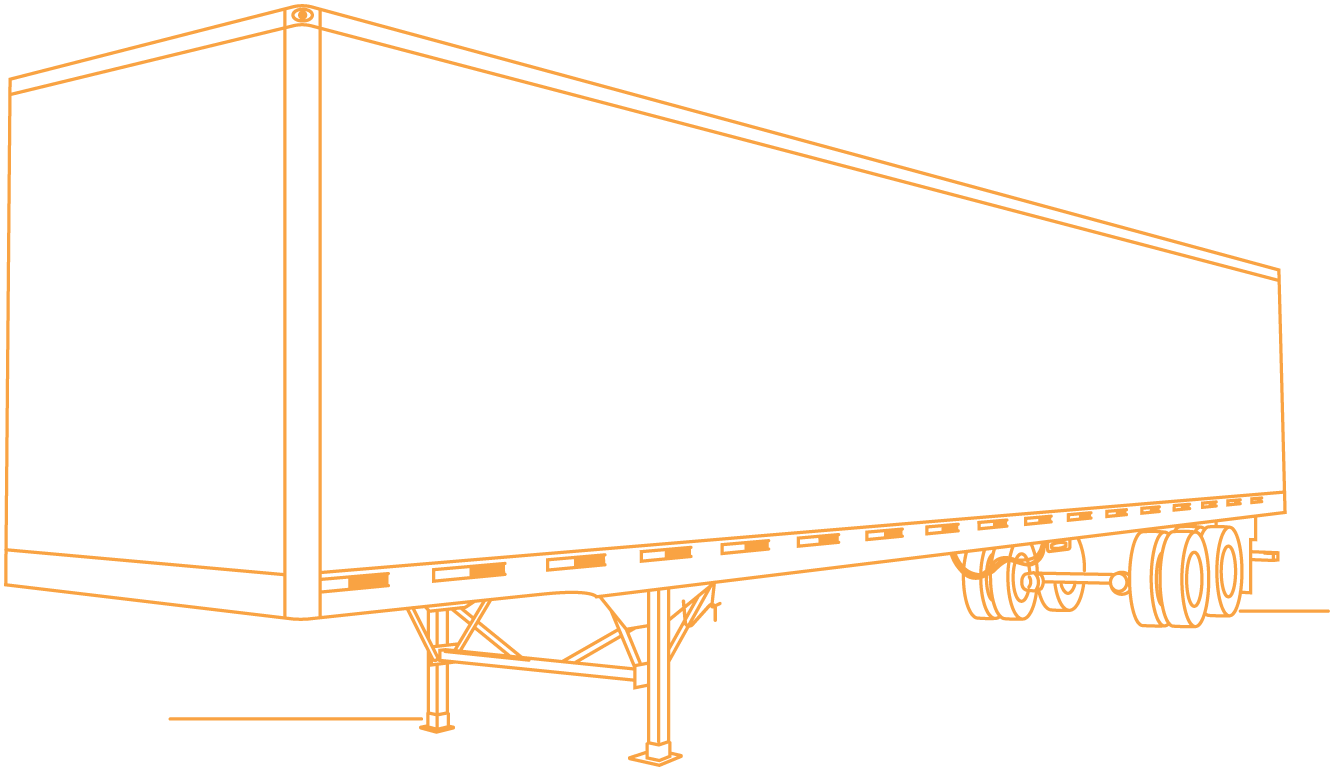
Start at the front of the trailer, then inspect the side and the back.
Finish with a trailer axle.
Front of Trailer: clearance lights are the proper color, not loose,
cracked, or dirty, and clean. Front of trailer has no holes, all rivets present.
Side of Trailer: no holes in side of trailer, all rivets in place.
DOT tape: properly secured, not dirty, covers at least 50% of the side.
Frame: not twisted or broken, all hardware present and tight.
Cross members: securely mounted, not loose or broken, none missing.
Floor: securely mounted and no holes.
Landing gear: is raised, not broken, securely mounted; Handle not broken,
securely mounted, and operational.
Clearance light: proper color, not loose, cracked or dirty; rubber gasket
not split or cut.
Air lines: are securely mounted under trailer, no audible leaks, not
dragging on the ground.
Tandem slide: not bent, properly mounted, pins locked in place.
Release arm: securely mounted, not broken, and in locked position.
Mud flap: securely mounted, no cuts, and proper distance from tire and
ground.
ABS light: not cracked or dirty, proper color, no moisture
inside
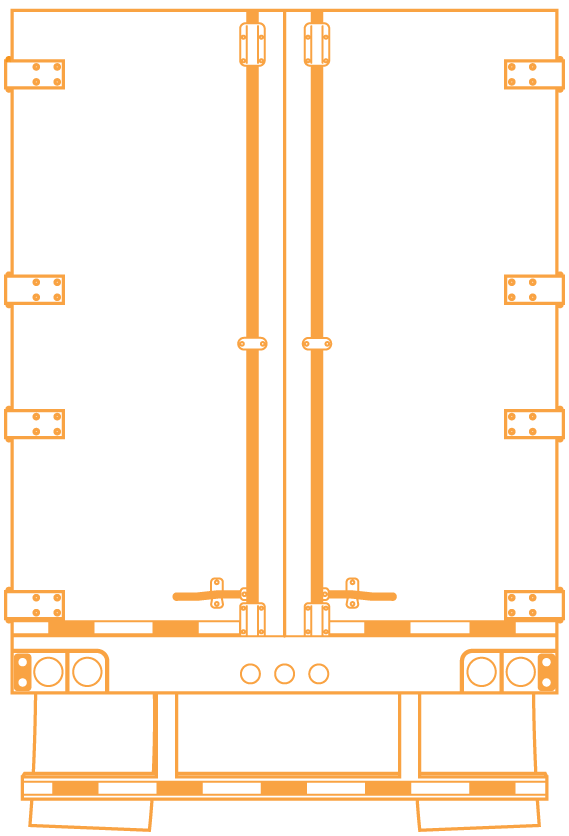
Back of Trailer: clearance lights are the proper color, not cracked or
dirty, and clean.
Hinges: are securely mounted, bot cracked or broken.
Doors: not broken, no holes; door seal intact, no cuts, securely
mounted.
Door handles and rods: are not bent, are securely mounted, and
operational.
Lights: proper color, securely mounted, not loose, cracked or dirty.
DOT tape: is securely mounted, clean, and covers 100% of rear.
Bumper: is properly secured, not cracked or broken.
Trailer Axle
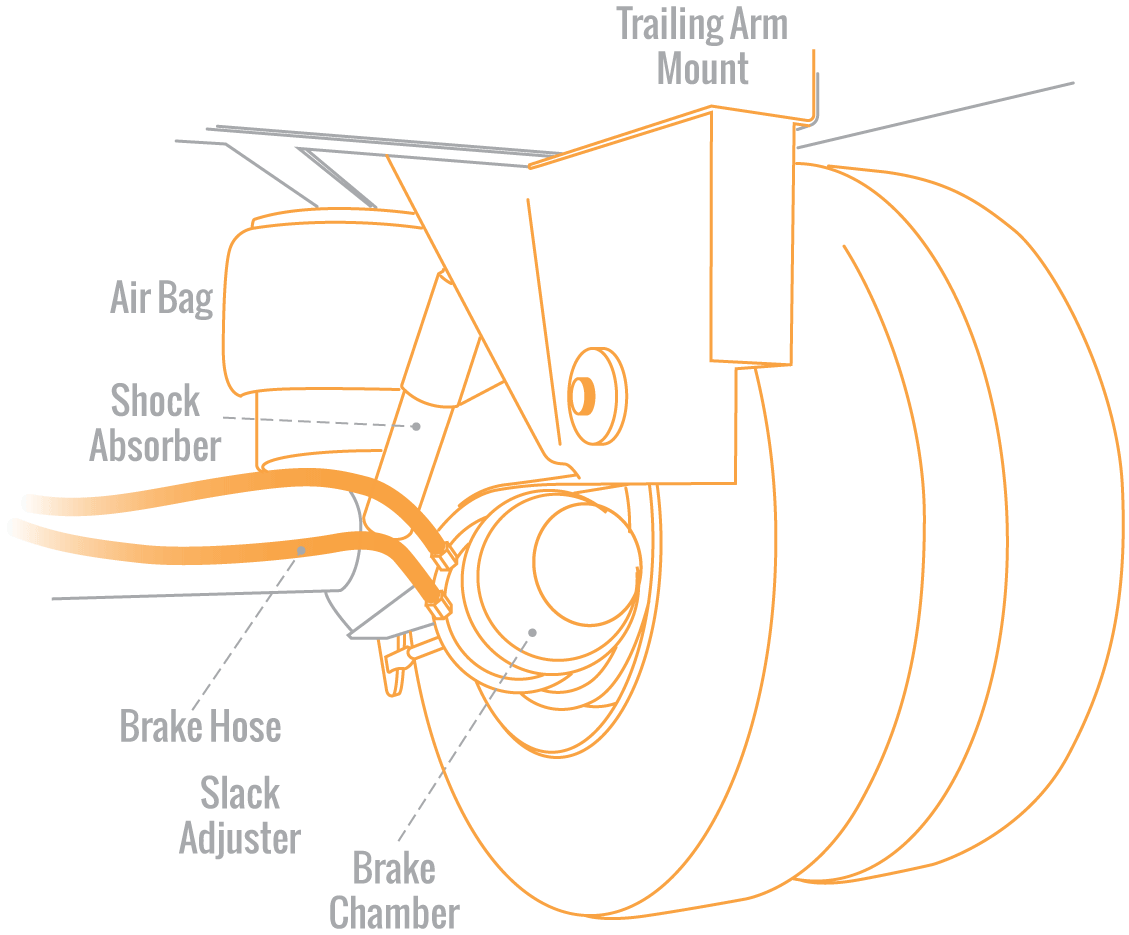
Note: axle suspension components can be different from truck to truck. You should determine which suspension components are present and inspect those components. Axles consist of suspension, brakes, wheels, and tires.
Trailing Arm Mount: securely mounted to
frame, not broken or cracked.
Spring mounts: spring mounts and hardware are not
cracked or broken and properly mounted to frame.
Leaf Springs: not cracked or broken, not shifted
or scissored; properly mounted to spring hangers.
U-bolts: not cracked or broken and securely
mounted.
Shock Absorber: not bent or broken and mounted
securely; no visible leaks; rubber bushings have no dry-rot.
Air Bags: not split or cut, no audible leaks;
mounts are properly securedand not cracked.
Brake Hose: hose to brake chamber not split or
cut, no audible leaks, securely mounted at both ends.
Brake Chamber: not cracked or broken and securely
mounted; no audible leaks.
Slack Adjuster: no missing hardware and properly
mounted; push rod has no more than 1" of play and is at a 90° angle to brake chamber.
Brake Drum: securely mounted and not broken, no
bluing from excessive heat.
Brake Pads: securely mounted and not broken;
minimum brake pad thickness is 1/4".
Wheel inside: not broken and securely mounted; no
welding repairs.
Tires: sidewalls have no cuts or bulges; tread
depth on drive tires is 2/32" min.; evenly worn; check inflation w/ air gauge (do not kick tires); can be re-treads;
Dual Tires: no foreign objects between tires, no gap between wheels.
Wheel Outside: not cracked, securely mounted, no
welding repairs.
Valve Stem: properly secured and not broken; no
audible leaks, has a metal cap.
Lug Nuts: not cracked or broken; all lug nuts are
present and tight.
Hub Seal: not cracked, broken, or loose; no
visible leaks.
End this inspection at the Hub Seal.
05:External Light Check
Follow the flow to avoid missing any lights: 4 sides for the truck, 4 sides for the trailer.
Group similar lights together (headlights and high beams; turn signals and 4-way flashers; brake lights and tail lights).
TRUCK LIGHTS
Front: clearance lights, headlights, high beams, left turn, right turn, 4-way flashers
Left side: clearance light, left turn, 4-way flasher
Rear: tail lights, brake lights, left turn, right turn, 4-way flashers
Right side: clearance light, right turn,4-way flasher
TRAILER LIGHTS
Front: clearance lights
Left side: clearance light, left turn, 4-way flasher
Rear: clearance lights, tail lights, brake lights, left turn, right turn, 4-way flashers
Right side: clearance light, right turn, 4-way flasher

06: In Cab and Brake Test
Memorize this formula:
5, 5, Safe Start, 5, 5
5 safety items
5 in cab items
Safe Start
5 gauges
5-step brake check
5 Safety Items
Start at the driver side door and work your way to the right.
Seat belt: securely mounted, belt has no cuts or frays, adjusts properly,
and latches and unlatches.
 Horns: ensure that both horns are
operational.
 Fire extinguisher: properly charged and
rated, securely mounted, pin in place.
 Triangles: must have 3, not
cracked or broken, reflective.
 Fuses: must have spare fuses or
circuit breakers; if vehicle does not use fuses, mention to tester.
 After inspecting your safety items, turn
the key on and continue your inspection.
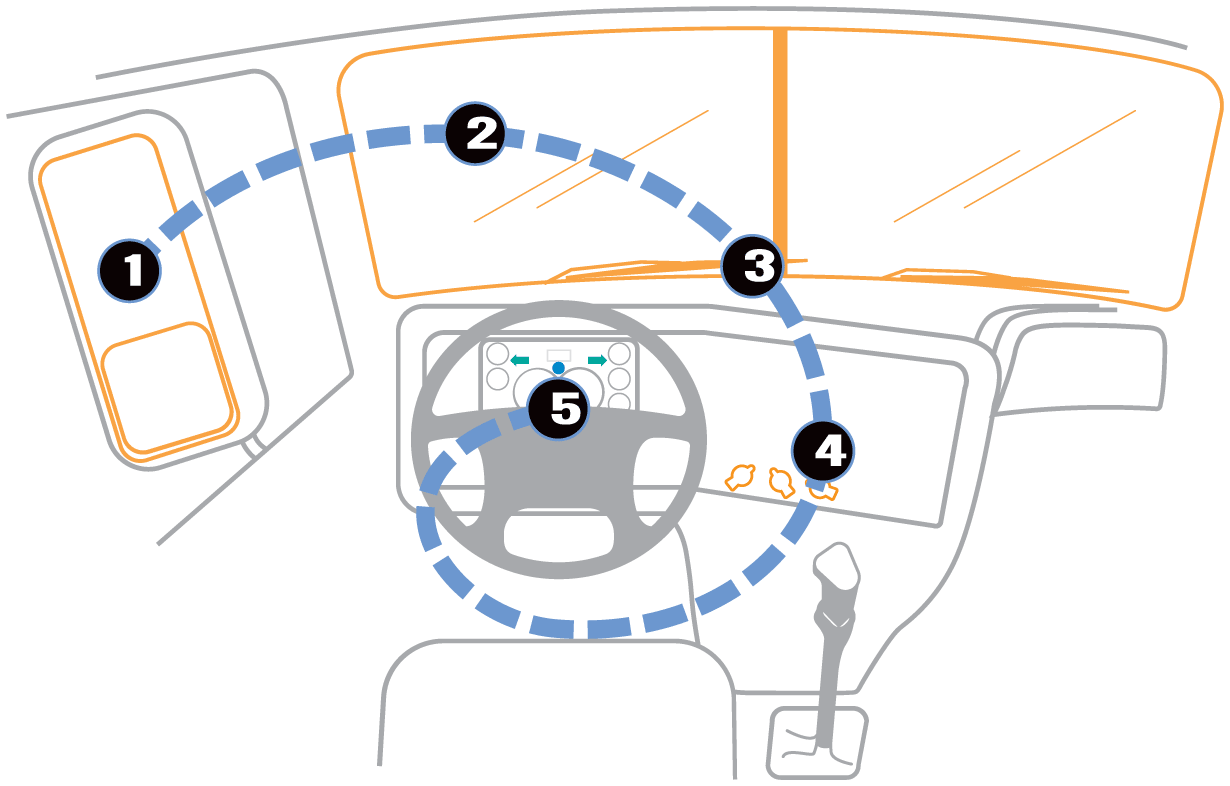
5 In Cab Items
Follow the blue spiral shape below to remember the 5 in cab items.
Mirrors: glass not dirty or cracked, no illegal stickers, mirrors properly
adjusted.
Windshield: securely mounted, not dirty or cracked, no illegal
stickers.
Windshield wipers: arms properly mounted and not broken; blades have no
splits or cuts, wipers and wiper fluid are operational.
Heater/defroster: demonstrate both are operational by setting fan to max,
and the mix valve to heat/defrost.
Dashboard light indicators: turn the lights on and check the indicators for
the high beams, right and left turn signals, and 4-way flashers.
Safe Start
Tell the examiner these 3 steps before you perform them: parking brake is set, transmission in neutral, and the clutch is
depressed.
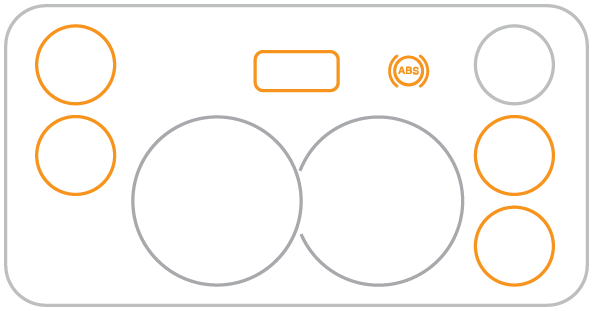
Start the engine and look for the ABS light on the dash to come on and then
go off. With the vehicle started, check the gauges.
5 Gauges
Oil gauge: operational, rising to proper operating range, no warning
light.
Temperature gauge: operational, rising to proper operating range, no
warning light.
Voltmeter: operational, at the proper operating range, 12-14 volts.
Air gauges (2): building air to proper operating range, no warning
lights.
5-step Brake Test
Explain each step before performing it.
With the first 2 steps, you’re either trying to move the vehicle, or you are moving the vehicle. The engine must be ON for
the first 2 steps.
1) Parking Brake: release trailer brake (push RED valve IN); slowly release
the clutch, tugging lightly against the parking brake. Push clutch in. (Leave everything in the truck as it is).
2) Service Brake: (brake pedal) release parking brake (BOTH valves should
be IN), pull forward to 5 mph, depress clutch and brake while lightly gripping the steering wheel; check if vehicle pulls to
the left or right. (Leave everything in the truck as it is).
**Turn the engine OFF, and turn the key ON for the next 2
steps.
You’ll need power for your gauges.**
3) Applied Test (Leaks): depress and the hold brake pedal and count to
60. Watch the air gauges. They should not lose more than 4psi in 1 minute (3psi for Class B).
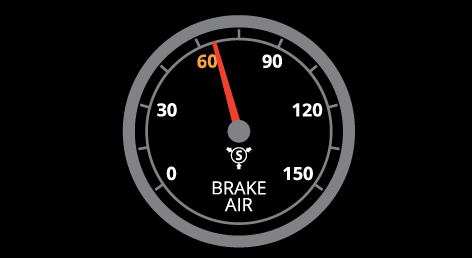 4) Low Air Warning: fan
brake pedal until the air gauge reads ~60psi. Stop fanning when the low-air emergency light and/or buzzer come on.
 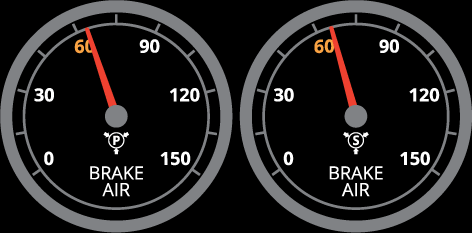 5) Emergency Spring Brakes
(Pop-Out): continue fanning the brakes down to 40–20psi, at which point the brake valves should pop out. Look at the
valves, not the gauges. Do not pull the valves out!
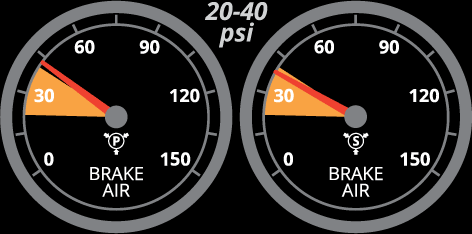
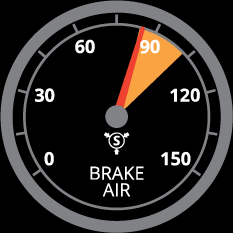
Air Compressor check: perform a Safe Start. Idle up the engine (1200RPM) until the secondary air tank reads 85psi. At 85psi begin counting. The air pressure must rise from 85 to 100psi in 45 seconds or less. Next, fast idle the truck up to 120-140psi, at which point the governor cut-out should occur. Psshhh!
Class A CDL Pre-Trip Inspection Video
Instructor Atom demonstrates a full Class A CDL Pre-Trip inspection.Want the youtube version of the Class A Pre-Trip Inspection video? Watch the youtube version.
Would you like our help finding a CDL driving job?
Try our version of a job board- Gary's Job Board. CDL Job BoardReceive daily job offers in your email for FREE. Sign up takes 2
minutes. Review Gary’s jobs. Reply to the jobs you like, trash the crappy ones. Gary puts drivers in control.
Visit CDL College for all of your truck driving school needs.
Class A Pre-Trip Inspection Study App Copyright© 2018 CDL College